
The Button Bit Operator's Manual: Seven Rules Nobody Handed You With the Bit
A button bit shows up on site in a cardboard box. Inside: the bit, maybe a spec sheet, maybe nothing. The assumption is that whoever's running the drill knows what to do with it. And mostly they do — until a bit fails at thirty meters and someone's standing there holding a carbide insert that should have lasted three hundred.
Here are seven rules for getting a button bit from new to normally worn-out, covering everything from the purchase order to the failure report. None of them are complicated. All of them save bits.
Rule 1: Choose the Bit for the Job, Not the Shelf
Before you order, answer four questions. Not three. Four.
The rock. Hardness, abrasiveness, and whether the formation is massive or fractured. Hard, abrasive granite needs a different insert grade and face design than soft, fractured limestone. Wrong grade, and you're either chipping inserts (too hard/brittle for the formation) or wearing them flat in half the expected meterage (too soft).
The drilling method. Surface or underground? Production drilling, development drifting, or roof bolting? Each application has different priorities: penetration rate, hole straightness, bit life. A bit optimized for high-speed production blasting in an open pit isn't the right bit for careful roof bolt hole drilling underground.
The flushing medium. Water or compressed air? Water cools better but requires corrosion-resistant bit body steel. Air is simpler but runs hotter — carbide inserts see higher thermal cycling, which influences grade selection. This matters enough that some bit manufacturers have separate product lines for wet and dry drilling.
The drill. Heavy hydraulic drifter or light pneumatic hand-held? Impact power class determines what the bit body and thread connection need to handle. Put a lightweight bit on a high-power drifter and the body will fatigue-crack at the thread root.
Get these four right before you open the catalog. A bit that's perfectly good for the wrong application is just an expensive paperweight.
Rule 2: Collar Like the First Ten Seconds Count
They do. Full impact and full feed on a bit that hasn't seated yet concentrates the entire blow on whichever insert happens to touch rock first. In hard, uneven ground, that single-insert overload chips or fractures carbide.
Drop the impact pressure and feed force for collaring. Let the bit establish a full-face dimple. Once the hole is started and the bit is stabilized by the hole wall, bring the parameters up to normal. The ten seconds of restraint at the start of every hole buys hours of bit life at the end of the shift.
Rule 3: Tune the Parameters, Then Watch the Temperature
The right combination of impact, feed, and rotation isn't the same for every hole. It changes with rock hardness, hole depth, and bit wear state. The standard you're tuning for: no jamming, maximum penetration rate, no rod bending.
There's a simple diagnostic most crews don't use: temperature. Put your hand on the coupling sleeve between the shank and the first rod. If you're flushing with water, it should be no hotter than about 40°C — warm to the touch, not uncomfortable. If you're flushing with air, up to about 70°C is normal — hot but touchable.
If it's hotter than that, something's wrong. Probably insufficient flushing, or the bit is dull and generating friction heat instead of breaking rock. Fix the cause, don't just keep drilling.
And the rule within the rule: never, ever run without flushing. Not even for a few seconds. A dry-running bit heats the carbide inserts to temperatures that cause thermal shock cracking when the flushing comes back on. The damage is instant and irreversible.
Rule 4: Inspect on a Schedule, Not When You Remember
After a shift or a set number of meters — whatever cadence makes sense for your operation — pull the bit and look at it.
Check the inserts: any flats wider than one-third the insert diameter need regrinding. Any chips, cracks, or snakeskin patterns mean the insert is compromised. Check the bit body: is the gauge area wearing evenly, or is reverse taper developing? A reverse-tapered bit body will wedge in the hole. Once it sticks, the extraction forces can damage the entire drill string.
Regrind inserts before the wear flat gets too large. A properly ground button restores penetration rate and reduces impact stress on the remaining inserts. If the body or inserts are past the regrind limit, retire the bit. One stuck bit or one broken insert that takes out neighboring inserts costs more than a timely replacement.
Rule 5: When a Bit Fails Early, Document Everything
An early failure — a bit that loses inserts or fractures the body well before normal life — isn't just a purchasing problem. It's data. But only if you capture it.
A proper failure report to the supplier should include: drill make and model, actual operating parameters (impact pressure, frequency, feed force, rotation speed), rig type, the full drill string configuration (shank, rods, couplings — manufacturer and specifications for each), rock type and hardness, drilling location and method, hole depth, and a detailed failure description — which inserts failed, how they failed (broken, fallen out, worn), at what meterage, and what the normal average life is for comparison.
A supplier who's serious about quality will want this data. A supplier who doesn't ask for it isn't tracking their own product performance. Think about what that says.
Rule 6: Flushing Pressure Is a Performance Parameter
Low flushing pressure doesn't just risk overheating — it leaves cuttings in the hole. Those cuttings circulate around the bit body, grinding against the gauge row and the bit face. The bit is effectively drilling through its own debris. Penetration drops, wear accelerates, and the risk of jamming goes up.
Adequate water or air pressure flushes the hole clean and keeps the bit cutting virgin rock with every blow. Monitor your flushing pressure. If it drops, find out why before you keep drilling.
Rule 7: Specify, Don't Assume, When Ordering
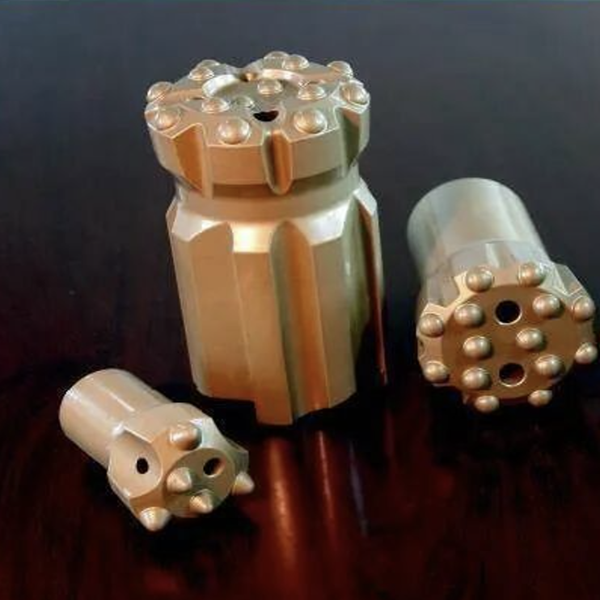
When you place an order for button bits, the supplier needs more than a part number. Specify: the bit body profile, the insert shape (spherical hemispherical or ballistic conical), the insert count and face layout, and the thread connection type. If you're replacing an existing bit, send a photo or a sample.
Two bits with the same diameter and thread can have completely different face designs optimized for completely different rock. Leaving the specification to guesswork is how you end up with bits that drill fine in the test hole and fail in production.



