
Seven Rules for Any Drill Bit, Any Rig, Any Rock: The Consensus That Decades of Fieldwork Built
Pick up any Chinese drill bit manual, any WeChat article from a rock tool manufacturer, any training pamphlet handed to a new operator in a mine in Shanxi or a quarry in Sichuan. You'll find the same rules, in roughly the same order, with almost the same wording. The seven rules of drill bit usage aren't one company's opinion. They're the accumulated consensus of an industry that's drilled more rock in the last forty years than most countries drilled in the previous century.
Here they are. Not because they're new. Because they're right.
1. Match the Bit to the Rod — Same Supplier, Same Spec
A tapered bit driven onto a mismatched rod taper is a bit waiting to come off in the hole. The interference fit between the cone on the rod and the socket in the bit transmits every impact. If the angles don't match, the load concentrates on a line instead of a surface. The taper galls. The bit works loose. The rod and bit degrade each other.
Buy bits and rods from one manufacturer. It eliminates the tolerance-stacking problem at the most critical interface in the entire drill string. The price difference between matched and mismatched tooling is negligible. The downtime difference is not.
2. Collar Light — Then Open Up
The first contact between bit and rock is the most dangerous moment in the drilling cycle. The rock face is uneven. The bit isn't stabilized by the hole wall. Full hammer force on that first touch concentrates the entire impact on one or two inserts — or on a fraction of a chisel edge. Carbide cracks. Edges chip.
Drop the air. Drop the impact. Let the bit scribe a dimple. Once it's seated, bring the pressure up. Ten seconds of restraint per hole buys hours of bit life per shift.
3. Three Millimeters Is the Red Line — Regrind Before You Cross It
Every bit wears. The cutting edge develops a flat. When that flat reaches 3 millimeters wide, the bit is done — not destroyed, but due for regrinding. At 3 mm, the contact area has grown to the point where impact energy disperses instead of penetrates. The bit heats up instead of cutting. Penetration drops. And in chisel bits, the wider flat catches on fractures and jams.
Regrind at 3 mm, not after. A properly reground bit drills almost as fast as new and costs a fraction of the replacement price. A bit run past 3 mm wears exponentially faster and risks catastrophic insert failure.
Watch for reverse taper too — the bit body narrowing toward the face. A reverse-tapered bit wedges tighter with every blow. Once it sticks, the extraction can destroy the rod and waste the hole.
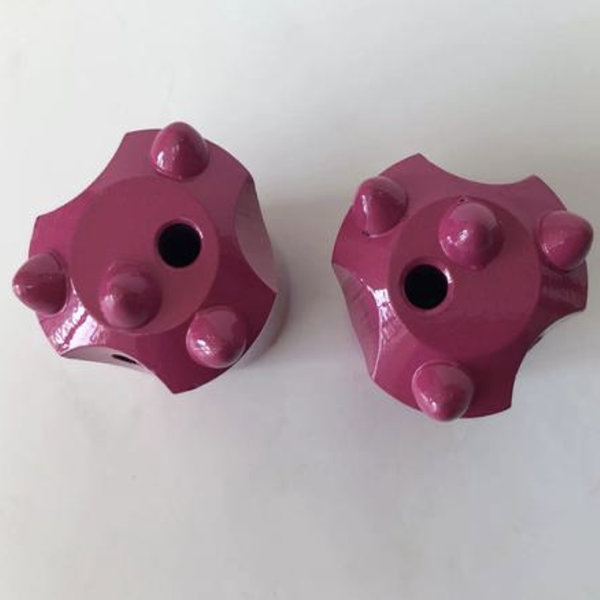
4. Rebar Is Not Rock — Move the Hole
A drill bit optimized for brittle rock fracture has no business hitting ductile steel. Carbide on rebar chips the insert or cracks the braze joint that holds it. A detached insert at the bottom of a hole is a fishing job. Move the hole. Adjust the angle. Do whatever it takes to avoid drilling into embedded metal. The time spent repositioning is never as expensive as the time spent recovering a broken bit.
5. If the Bit Keeps Jamming, Switch Bit Types
Jamming is a geometry problem. A chisel bit is a wedge with a single cutting edge — it catches on ledges, wedges in cracks, and hangs up on irregular faces. If you're fighting the bit on every hole, the bit type is wrong for the ground.
Switch to a cross bit — the second edge at 90 degrees prevents ledge-catching. If cross bits still jam, go to button bits — the distributed insert pattern rides over irregularities that trap single-edge designs.
Don't blame the bit. Blame the match between the bit and the rock. Fix the match.
6. When Wear Is the Problem, Change the Bit Grade
If bits are wearing out — not breaking, not jamming, just wearing the inserts down too fast — the carbide grade is wrong for the formation. Hard, abrasive rock needs inserts with higher wear resistance: lower cobalt content, finer grain structure. Switch to a harder grade and the wear rate drops.
If bits are chipping inserts in fractured ground, the grade is too hard and brittle. Switch to a tougher grade with higher cobalt content. The difference between the right grade and the wrong one can double or triple bit life in the same rock.
7. Water Is Not Optional
Flushing water — or air, for DTH — does three things simultaneously. It cools the bit, preventing thermal stress that cracks carbide. It clears cuttings from the hole, preventing the bit from regrinding its own debris. And it reduces dust, keeping the operator's lungs cleaner and the work area safer.
Water that starts late — after the bit has heated up — creates thermal shock. Cold water on hot carbide generates surface tension cracks. The damage is instant and invisible. The failure comes hours later.
Turn the water on before the hammer. Keep it on until the hole is done. Adequate flow, uninterrupted. The simplest rule on the list, and the most commonly broken.
The Reason These Rules Repeat
You'll find versions of these seven rules in manufacturer documentation from companies that compete with each other. They appear in training materials targeting completely different market segments — hand-held pneumatic tooling, hydraulic jumbos, DTH rigs. The wording shifts slightly. The order sometimes changes. But the substance doesn't.
That's because these aren't marketing points. They're the minimum operating standard that separates normal bit wear from premature failure. They were learned through millions of holes drilled, millions of bits consumed, and millions of dollars in avoidable downtime.
The rules are free. Ignoring them is expensive.



