
Six Rules for Keeping Your Drill Bits Alive Longer Than Your Budget Expects
Bit wear is inevitable. Premature bit wear is not.
A carbide button bit drilling medium-hard granite should deliver hundreds of meters before the gauge row is worn past re-grinding limits. If yours are dying at half that — inserts flattening early, gauge rows wearing unevenly, micro-cracks appearing on buttons that should still have life — the problem isn't the rock. The rock is just doing what rock does. The problem is something happening between the drill controls and the bit face.
Here are six rules that keep bits alive longer. None of them are complicated. All of them save money.
Rule 1: Know When to Pull and Re-Grind
A bit that's run past its regrind window isn't saving you time. It's drilling slower, putting more stress on the string, and wearing the button past the point where re-grinding can restore the profile.
Three signals tell you it's time:
Penetration drops by 30%. Not a rough guess — you notice it. The drill sounds different, the feed feels different, the advance rate isn't what it was an hour ago. When you're losing a third of your speed with the same rig on the same rock, the bit is telling you the cutting edges are gone.
The wear flat reaches one-third to one-half the insert diameter. Look at the buttons. A new insert has a domed top. A worn insert develops a flat spot — the wear flat — where it contacts the rock. When that flat spot's diameter hits one-third of the button diameter, regrind. At one-half, you're pushing it. Beyond that, you're grinding away too much carbide to restore the dome, and the insert's effective life is shortened.
Snakeskin or micro-cracking appears. Snakeskin — a network of fine surface cracks on the carbide — is thermal fatigue. The insert surface is heating and cooling too rapidly, usually from intermittent flushing. Micro-cracks visible to the naked eye mean the carbide is breaking down. Don't keep running a cracked insert. It'll spall, and the spall will take out neighboring inserts.
Rule 2: Collar Wet, Not Dry
This one is non-negotiable and violated constantly.
When you start a hole, the bit has no hole wall around it. It's sitting against raw rock, and the impact energy goes into the rock surface and the bit face. Without flushing water flowing through, that energy turns into heat — fast. Carbide can take high temperatures in compression, but it's brittle in tension, and the thermal gradients from rapid heating create tensile stress at the surface.
Here's the sequence that destroys bits: operator collars dry, bit heats up, operator finally turns on the water, cold water hits hot carbide, thermal shock creates micro-cracks, micro-cracks propagate under impact, insert fails. The bit didn't wear out. It was thermally shocked to death.
Open the water before you pull the trigger. Collar with low feed and low impact until the bit is seated and the hole is started. Then bring the parameters up.
Rule 3: Flushing Pressure Is Not Optional
Cuttings left in the hole don't just slow penetration. They grind against the bit body and the gauge row like lapping compound. Every rotation, the bit rubs against a slurry of rock particles moving past at high velocity. That's abrasive wear, and it's worse than formation wear because the particles are loose and angular — they dig into the steel and the carbide at odd angles.
Adequate water pressure (for hydraulic/hydraulic-percussive) or air pressure (for pneumatic/DTH) flushes those particles up the annulus before they get a chance to do damage. Inadequate pressure means particles recirculate around the bit face. The bit is effectively drilling through its own cuttings. Penetration drops, wear accelerates, and the risk of jamming goes up.
Rule 4: Light on the First Tooth
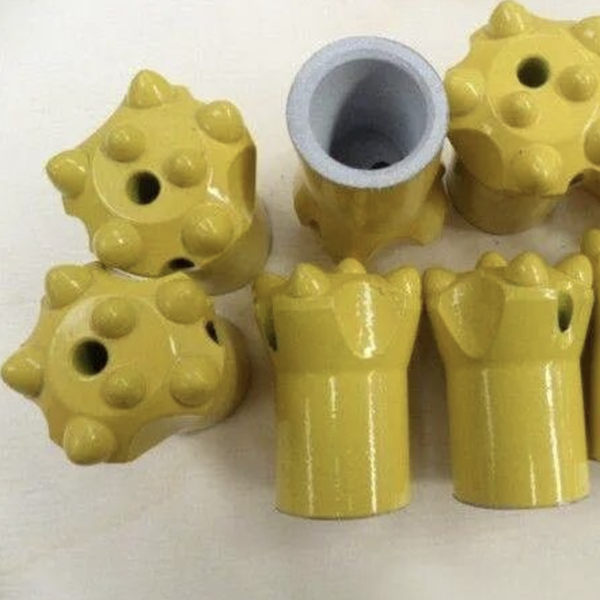
When a bit collar first touches uneven rock, the load often concentrates on a single insert — the one that happens to hit the highest point. If you're running full impact and full feed during that first contact, that single insert takes the entire blow. Single-tooth overload cracks or chips inserts, especially in hard, blocky ground where the rock surface is irregular.
Drop the impact and feed for collaring. Let the bit establish a full-face contact before you bring the hammer down. The first thirty seconds of restraint pays off in hours of bit life.
Rule 5: Inspect After Every Hole
This sounds obsessive. It takes thirty seconds. Look at the bit face. Check for flattened buttons, chipped gauge-row inserts, and reverse taper — where the bit body wears narrower toward the shank, creating a wedge that can jam in the hole.
A reverse-taper bit is dangerous. It can stick in the hole, and pulling it free puts enormous stress on the entire drill string. If you see reverse taper developing, swap the bit immediately, even if the buttons still look serviceable.
If the bit has worn past the point where re-grinding makes sense, retire it. A bit that costs twenty dollars in regrinding to get five more meters of hole is a bit that should have been retired after the last hole. Do the math, not the wishful thinking.
Rule 6: Never Run Without Flushing — Not Even for a Second
Impact drilling generates friction heat at the bit-rock interface. Without flushing medium — water or air — flowing through the bit, that heat has nowhere to go. The bit body temperature climbs fast. The carbide inserts, in direct contact with the rock, heat even faster.
Cut the flushing for even a few seconds during drilling, and you've subjected the carbide to a thermal spike. Do it repeatedly, and the cumulative thermal cycling causes the micro-cracking mentioned in Rule 1. Worst case: an insert fractures mid-hole, fragments of carbide circulate around the bit face, and neighboring inserts get chewed up by their own debris.
If the water stops or the air compressor cuts out, stop drilling. Don't try to "finish the hole real quick." The hole will still be there when the flushing comes back. The bit might not be.
The Pattern
These six rules don't require new equipment or premium tooling. They require attention. Pull the bit when it tells you it's dull. Collar wet. Flush hard. Start light. Inspect quickly. Never run dry.
A bit that's run by these rules will drill more meters, cost less per meter, and retire from normal wear — not from a preventable failure that shows up as an urgent purchase order and a crew standing around waiting.



