
The Failure That Looks Like Three Different Problems but Isn't: Inside the Drill Rod's Worst Corrosion Zone
Ask a driller why a joint of pipe failed, and you'll get one of three answers: "it cracked," "it washed out," or "it parted." Three different descriptions. Three different mental images. Three different troubleshooting paths.
Here's the thing nobody tells you until they've done the metallurgical analysis: those three failures are the same failure. One mechanism, three appearances. And according to research from China National Petroleum Corporation's tubular goods division, that one mechanism accounts for 70% of all drill string failures.
The Location: Where the Pipe Changes Shape
Every drill pipe has an internal upset — a thickened section at each end where the tube body transitions into the tool joint. The internal diameter steps down through a tapered transition. That transition is where the problem lives.
Why there? Two reasons. First, it's a geometric discontinuity. The cross-section changes, the stiffness changes, and stress concentrates at the change. Under the combined loading of drilling — axial tension, bending, torsional vibration — the transition zone sees the highest local stress in the entire joint.
Second, it's a flow discontinuity. The drilling fluid accelerates as it passes through the narrower ID, and the flow pattern becomes turbulent right at the transition. Turbulent flow scours the surface. Any protective coating, any corrosion inhibitor film, gets scrubbed away fastest exactly where the surface is already most vulnerable.
The Appearance: Crack, Washout, or Parting
The failure shows up three ways, but the sequence is always the same.
Stage one: the crack. It starts at the bottom of a pit — a tiny corrosion pit on the internal surface, right at the transition. The pit is a stress concentrator. Under cyclic loading, a fatigue crack initiates at the pit bottom and grows. At this stage, the pipe looks fine from the outside. You'd only catch it with internal inspection.
Stage two: the washout. The crack penetrates the wall. Drilling mud, under thousands of PSI, finds the crack and forces through it. The mud flow through the narrow crack is extremely fast — fast enough to erode the crack walls and widen it into a hole. This is the "washout" that operators see: a pinhole leak that appears suddenly and grows while you watch the pressure gauge.
Stage three: the parting. Multiple washout holes connect. The remaining steel between them can't carry the load. The pipe parts. A joint that looked fine on the last connection is now two pieces, one of which is downhole.
The critical insight: by the time you see a washout, the crack was already there. And the crack started at a pit that started as a corrosion site that started when the pipe was put away wet.
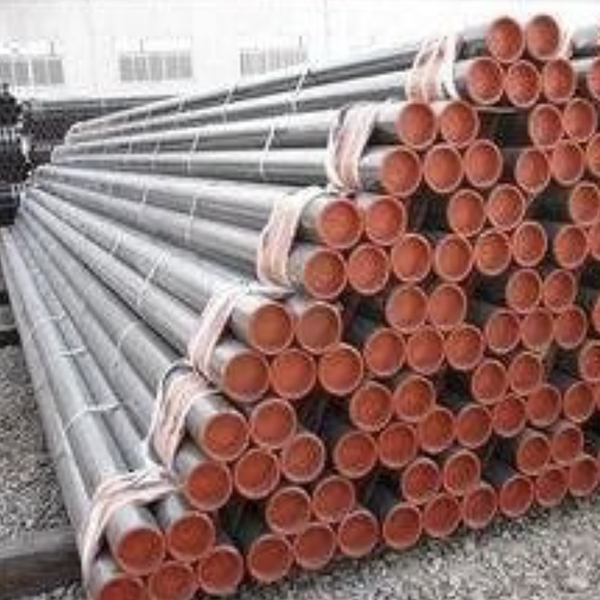
The Root Cause: Corrosion That Happens in the Rack
Here's the part that surprises people: the corrosion that eventually parts a drill pipe usually isn't happening while the pipe is drilling. It's happening while the pipe is sitting in the rack between jobs.
When a joint comes out of the hole, the inside is coated with drilling mud and formation fluid. That residue is corrosive — chlorides, sulfides, organic acids, dissolved oxygen. If the pipe goes straight into the rack without cleaning, that residue sits in the bore. It dries, concentrates, and attacks the steel.
The internal surface at the upset transition is especially vulnerable because the internal coating — if the pipe has one — is typically already thin or missing there, scrubbed away by turbulence during drilling. Bare steel, coated in corrosive residue, exposed to oxygen. That's an open-circuit corrosion cell. It doesn't stop until the pipe goes back in the hole, by which point the pitting has already started.
The Prevention That Works
You can't eliminate the stress concentration at the upset transition — it's inherent to the pipe design. You can't eliminate the corrosion potential of drilling fluid — it's inherent to the process. What you can control is whether the pipe goes into storage clean and dry.
The procedure is simple but rarely followed completely: wash the pipe internally before racking it. Fresh water flush to remove drilling fluid residue. Then dry it — compressed air through the bore until no water comes out. For long-term storage, an internal coating of preservative oil. Cap the ends.
Pipes that go into storage clean and dry don't develop the pitting that becomes the crack that becomes the washout that becomes the parting. Pipes that go in dirty and wet are pre-loading their own failure.
The Detection
Once a pipe is in service, internal pitting at the upset transition can only be found by inspection. Standard external inspection won't see it — the damage is on the ID. Magnetic flux leakage (MFL) inspection catches wall loss from pitting. Electromagnetic inspection catches cracks. Neither is perfect at the transition zone, which is why inspection programs typically use multiple methods and schedule internal inspection based on service hours rather than visible condition.
The pipe that looks fine from the outside and parts at the transition zone wasn't a mystery failure. It was a corrosion failure that had been developing for months, invisible to anyone who wasn't looking for it.
The Big Picture
70% of drill string failures, one location, one mechanism, one preventable root cause. The crack, the washout, and the parting are all the same story told at different volumes. The story starts with a wet pipe in a rack and ends with a fishing job and a lost hole.
The fix isn't a better pipe grade or a more aggressive inspection program — though both help. The fix is a storage discipline that recognizes the inside of the pipe matters as much as the outside, and the transition zone matters most of all. Clean it. Dry it. Protect it. The pipe will do the rest.



