
The Half of Drill Tool Life Your Supplier Can't Control
There's an uncomfortable truth about drill steel that sales brochures don't mention: roughly half of how long your tools last has nothing to do with who made them.
A well-made rod in the hands of an operator who collars at full throttle, ignores bit wear, and treats the steel like a pry bar will die young. A mid-tier rod run by someone who checks the fit, starts slow, and retires dull bits on schedule might outlast the premium one on the next heading.
Two factors determine tool life: inherent quality and operational practice. The supplier controls the first. You control the second. And on most sites, the second is where the money leaks.
The Pre-Shift Check That Takes Two Minutes
Before the first hole of the shift, put eyes on four things:
The shank striking end. It should be flat, not mushroomed. A mushroomed striking face doesn't transfer impact energy cleanly — it deflects the piston blow, wastes energy, and accelerates wear on the piston face. If the shank end is deformed, pull the rod. The repair cost for a piston is orders of magnitude worse than the cost of a rod.
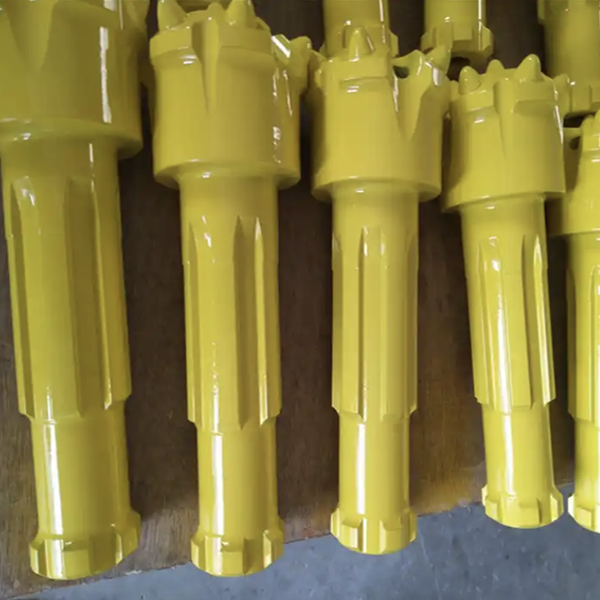
The taper seat. On tapered tooling, the cone on the rod and the socket in the bit need to mate cleanly. Any visible galling, deformation, or scoring on the taper means the fit is compromised. Insertion depth should be at least 25 mm — if it's shallower, the bit isn't seating fully and will rock under impact. Contact area across the taper should be at least 60%. Less than that and the load concentrates on a band instead of distributing across the full seat. Use rods with a machined taper, not a rough-forged one — the surface finish and dimensional accuracy make a measurable difference in bit life.
The bit cutting edges. On insert bits, look for flattened, chipped, or missing buttons. On blade bits, check for dulled or chipped cutting edges. A dull bit doesn't just drill slower — it sends higher shock loads back up the string because the energy that should go into rock fracture is reflecting off a rounded contact surface.
Water holes and flushing passages. Blocked flushing holes cause two problems: the bit overheats (especially on carbide bits, where thermal stress can crack inserts), and cuttings pack around the bit body, increasing torque and abrasive wear. Clear them before every shift. It takes ten seconds.
The Art of Starting a Hole
The first thirty seconds of drilling a hole matter more than the next thirty minutes. Here's why.
When the bit first touches rock, it's unsupported. There's no hole wall guiding it yet. If you hit it with full impact pressure and full feed force before the bit has established a stable collar, it bounces. The bit face skates across the rock surface. The rod flexes. The inserts take off-angle impacts.
The correct sequence: open the air or water to low pressure first. Let the bit rotate against the rock with light feed — just enough to start a dimple. Once the bit has seated and the first few centimeters of hole are established, bring the pressure up to normal. On a pneumatic rig, this takes maybe ten seconds. On a hydraulic jumbo, it's even faster because the controls are more responsive.
The difference in bit life between a properly collared hole and one started at full bore is not small. A bit that collars cleanly may drill hundreds of meters before the gauge row shows significant wear. A bit that's been bounced around during collaring can lose gauge-row inserts in the first shift.
Don't let bits bang into each other during handling, either. Carbide-on-carbide contact creates micro-fractures that propagate under impact. Treat bits like ceramic, not like steel — because the part that does the cutting is ceramic.
The Fit That Makes or Breaks a Setup
The interface between rod and bit is where impact energy crosses from one component to another. If that interface is sloppy, energy scatters. If it's tight and uniform, energy transmits.
For tapered connections: insertion depth no less than 25 millimeters, contact area no less than 60%, and the taper should be visibly clean and smooth. A rough or uneven taper might look "good enough" to the naked eye, but at thousands of blows per minute, the contact irregularities create localized pressure points that accelerate wear and can crack the bit skirt.
For threaded connections: match suppliers. This is the single most underrated rule in drill tool management. Threads from different manufacturers may both claim the same nominal specification — R32, T38, whatever — but tolerance class, thread form detail, and surface finish vary. Mismatched threads concentrate load on fewer engaged threads, and the ones that take the load fatigue faster.
The Two-Way Street
Here's the point worth sitting with: you can't buy your way out of bad practice. The most expensive rod on the market won't survive being run with a mushroomed shank, a sloppy taper fit, a dull bit, and a full-throttle collar.
But the reverse is also true. The best operators can't make bad steel last. If the material has inclusions, the heat treatment is uneven, the thread tolerances are loose, and the surface finish is rough — no amount of careful handling fixes that.
The sites that get the most meters per dollar are the ones that take both halves seriously. They buy from suppliers who can prove consistency — metallurgy reports, hardness profiles, dimensional inspection data. And they train their crews to treat every rod and bit like the precision component it actually is.
Check before you start. Start slow. Retire things before they fail catastrophically. It's not complicated. It's just discipline.



