
Grease Leaking From Your Rock Drill Head? It's Not Over-Lubrication — Check the Shank Adapter
When a pneumatic rock drill starts spitting grease from the front head, the first assumption is always the same: too much grease. Someone over-greased the chuck, now it's blowing out the excess, give it a shift and it'll stop. And sometimes that's true. But if the leakage doesn't stop — if it gets worse as the shift goes on, if there's a smear of grease and metal dust mixed together around the front head, if the drill feels hotter than it should at the chuck end — you're not looking at a lubrication problem. You're looking at a seal failure. And the seal didn't fail on its own.
How to Tell It's the Seal, Not the Grease Gun
A failed front head oil seal has a signature that's different from simple over-greasing, and once you know the pattern, the diagnosis takes thirty seconds.
Over-greasing produces a one-time purge: a glob of clean grease pushes past the seal, maybe for a minute or two after greasing, and then it stops. The grease that comes out looks like the grease that went in — clean, uniform, the right color.
A failed seal produces continuous leakage that changes with the drill's operation. The key diagnostic: no leak when the drill is stopped, leakage starts the moment the drill begins cycling, and the leakage rate increases with impact frequency. At full throttle, you'll see a steady ooze or spray pattern from around the chuck area. That's the seal lip being pumped by the piston's reciprocating motion — every forward stroke pressurizes the cavity behind the seal, and a damaged seal lip can't hold it.
If you pull the seal and inspect it — and you should, because you have to replace it anyway — look for these failure indicators: the sealing lip is curled backward, hardened stiff instead of flexible, has visible cracks or cuts, or shows a polished groove where it's been riding against the shaft. Any of these means the seal failed in service, not during installation.
While the seal is out, look at the groove it sits in. Metal debris in the groove, scoring on the groove walls, or a buildup of hardened grease-and-dust paste means the area around the seal has been running contaminated for a while. That contamination got past the seal because the seal was already compromised.
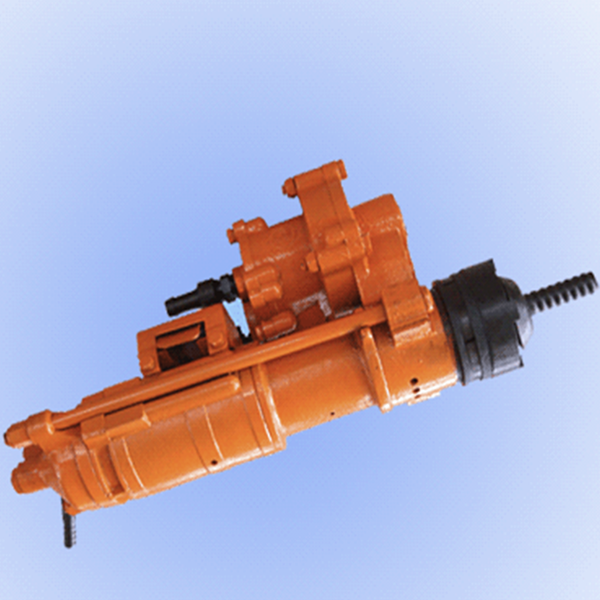
The Real Culprit: Worn Shank Guide Bushing
Here's the part that gets missed on half the seal replacements: the oil seal doesn't fail in isolation. It fails because the shank guide bushing — the component that supports and centers the shank adapter as it reciprocates — is worn beyond its service limit.
The shank guide bushing does exactly what its name says: it guides the shank adapter, keeping it centered in the drill's front head so the piston strikes true and the adapter transmits impact straight into the drill rod. The bushing's internal bore has a precise running clearance with the adapter shank — typically a few hundredths of a millimeter.
When that clearance opens up from wear, the shank adapter starts to wobble with every blow. The wobble is tiny — you can't see it — but it's enough to deflect the adapter off-center as it passes through the oil seal. Instead of the seal lip riding evenly against a centered, straight shaft, it's being pushed sideways on every stroke. One side of the seal lip gets overloaded and wears faster. The opposite side loses contact with the shaft entirely, creating a gap. Grease starts pumping out through the gap, and the seal is on a fast track to complete failure.
If you replace the seal without checking the shank guide bushing, you're putting a new seal into the same worn bore, with the same clearance, facing the same wobble. The new seal will fail in a fraction of its rated life. You'll be back in the same position in weeks or days, pulling the front head apart again, wondering why the seals don't last.
What to Check When You're In There
When you've got the front head open to replace the seal, measure the shank guide bushing. Check the internal diameter with a bore gauge or inside micrometer, and compare it to the manufacturer's specified service limit. If the clearance between the bushing ID and the shank adapter OD exceeds the maximum allowable, the bushing needs replacing — even if it "looks fine."
Also check the bushing's concentricity with the piston bore. A bushing that's worn unevenly — which happens when the drill is consistently operated at an angle or with bent drill rods — will have one side worn more than the other. That eccentricity forces the shank adapter to orbit instead of reciprocating straight, and orbiting guarantees seal failure.
While you're measuring, inspect the shank adapter itself. The sealing surface — the portion of the adapter shank that passes through the oil seal — should be smooth, free of scoring, pitting, or corrosion. Any roughness on that surface will act like sandpaper against the new seal lip. A shank adapter with a damaged sealing surface should be replaced or reconditioned before a new seal goes in.
The Grease Factor (It's Real, Just Secondary)
Over-greasing can contribute to seal failure, but it's rarely the root cause. What happens is this: excessive grease volume in the chuck cavity creates higher-than-design internal pressure. A seal in good condition can handle some over-pressure. A seal that's already compromised by a worn bushing — already deflected, already overloaded on one side — can't. The excess grease pushes past the weakest point, and the leakage accelerates.
The wrong grease type can also cause problems. Greases have different base oil viscosities, thickener types, and additive packages. Using a grease that's incompatible with the seal material — certain synthetic greases will swell or degrade nitrile seals, for instance — can chemically attack the seal lip. Using a grease that's too thin will leak past a seal that would hold a thicker product. Match the grease to the manufacturer's specification, not to whatever drum is closest to the drill.



