
Shank Adapter Troubleshooting: Look, Listen, Measure — A Three-Step Field Diagnostic
A shank adapter doesn't fail silently. It talks.
The problem is, most operators don't speak its language. They notice something's off — the drill sounds different, penetration rate dropped, there's a vibration that wasn't there yesterday — but they keep running because they can't pin it down. A shift later, the shank snaps or the water seal blows, and now it's a repair job instead of a ten-minute swap.
Here's a diagnostic framework that catches shank adapter problems before they become downtime. Three tiers, from stuff you can see on a walk-by to stuff you need a caliper to catch. Run these in order.
Tier 1: Visual — The Five-Second Check
Before the shift starts, pull the shank and look at it. You're checking four things:
Surface color. A healthy shank is steel-colored — grey, metallic, maybe a slight heat tint at the striking face. If the whole shank is dark, blued, or blackened, it's been running too hot. That means lubrication failed. The air-oil mist either wasn't reaching the shank, or the oil was the wrong grade for the operating temperature. Clean off the carbon, refill the lubricator with the correct high-temp oil, and check that oil is actually reaching the shank before you start drilling.
Cracks and chips. Look at the striking face, the thread root, and the spline shoulders. Any visible crack — even a hairline — means retire the shank. Immediately. Don't try to get "one more shift" out of it. A shank that fails catastrophically in the chuck can damage the drill's front end, and that repair bill makes a new shank look like pocket change. Chips or spalling at the striking face or spline edges mean the same thing. While you're at it, check the guide bushing. A worn bushing is often what started the cracking in the first place.
Spline wear pattern. The splines should show even, polished contact across their full length. If the front third of the splines is chewed up while the rear looks fresh, the shank is running in a worn bushing and oscillating. If the wear is concentrated on one side of each spline, check the drill alignment on the feed beam. Uneven spline wear is a geometry problem, not a metallurgy problem.
Overall deformation. Roll the shank on a flat surface. If it wobbles, it's bent. Retire it. A bent shank beats up the bushing, the seals, and eventually the piston.
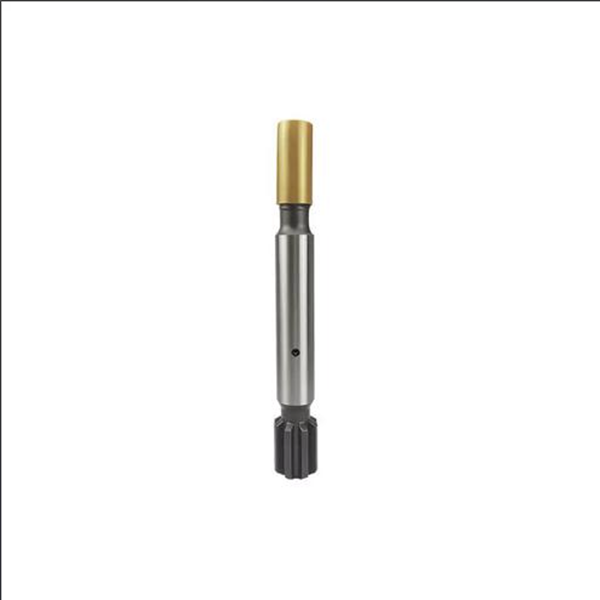
Tier 2: Audible — What the Sound Tells You
A hydraulic rock drill at full chat has a sound signature you learn to recognize. It's rapid, even, almost metallic white noise — a steady staccato with no gaps and no spikes. When something's wrong with the shank, the sound changes.
Clicking or clacking: irregular sharp sounds mixed into the steady impact rhythm. This usually means the shank is loose in the bushing — either the bushing is worn oversize or the shank is undersized from wear. The shank is bouncing radially between blows. Fix: measure bushing clearance. If it's in spec, the shank is worn. If it's out of spec, replace the bushing.
Dull thudding: the impact rhythm loses its crisp edge and becomes muffled. Classic sign of a cracked shank. The crack opens and closes with each blow, absorbing energy that should be going into the rock. Penetration rate drops before the shank actually breaks. If you hear this, stop and inspect immediately.
High-pitched squeal or screech: metal-on-metal with no lubrication film. The shank and bushing are grinding. Either the lubricator is empty, the oil line is blocked, or the oil is too thin for the operating temperature. Don't keep drilling — you're welding the shank to the bushing one micron at a time.
Tier 3: Measured — The Numbers That Matter
Some wear is invisible to the eye and silent to the ear, especially early-stage dimensional loss. A caliper catches it.
Water seal journal. The section of the shank that rides against the water seal has a specified diameter. When that diameter wears down, the seal can't hold. Water leaks past and into the drill's front end. Water in hydraulic oil is catastrophic — it emulsifies the oil, drops lubricity through the floor, and can destroy pumps and motors. If the seal journal on your shank is worn below spec, replace the shank. The cost of a shank is nothing compared to a hydraulic system rebuild.
Striking face and spline ends. Measure the striking face for dishing and the spline tips for mushrooming. The rule of thumb in the field: 1 mm of wear at any critical surface is the replacement threshold. More than that and you're losing impact energy transmission. The drill works harder to do less, and the shank is on borrowed time.
Bushing clearance. This is a system measurement, not a shank measurement, but it belongs in the same routine. Measure the bushing ID and the shank OD at the bushing contact zone. If the clearance exceeds the manufacturer's max spec, replace whichever side is worn — or both.
The Routine That Pays for Itself
Here's the whole thing compressed into a shift routine:
Before startup: visual check — color, cracks, splines, straightness. Five seconds.
During drilling: listen. If the sound signature changes, investigate before the end of the shift.
Weekly: caliper check on the seal journal, striking face, and spline tips. Record the numbers. When they hit 1 mm of wear, order the replacement. Don't wait for failure.
A shank adapter that's caught in Tier 1 costs the price of the shank. One that's ignored until it announces itself through a water leak or a snapped thread costs the shank plus whatever else it took down with it. The diagnostic framework isn't complicated. You just have to actually use it.



