
Tapered Drill Steel Management: The Cost of Running Tools Till They Scream
I was on a site visit once where the foreman showed me his "repair" pile. Thirty-some tapered rods, most with mushroomed striking ends, a few with cracks running up the shank, and one with a bit still fused to the taper — someone had evidently given up trying to separate them and just threw the whole assembly in the scrap bin.
"How many of these were still in service last week?" I asked.
He shrugged. "Some of them. You run 'em till they stop."
That pile was worth maybe four thousand dollars in avoidable replacements. And that's a small site. Scale it up to a contractor running a dozen hand-held rigs across multiple headings, and the annual waste from poor tool management runs into serious money.
Tapered drill steel — the stuff that goes into hand-held rock drills and small pneumatic rigs — is the highest-turnover consumable in the business. It's also the one that gets the least management attention, because the unit cost is low. A single rod is cheap. A single bit is cheap. But multiply by the volume a busy site burns through, and the math changes fast.
Here's how to stop bleeding money on tapered tooling, organized by the five areas where most sites leak.
Assembly: Don't Marry a New Bit to a Dying Rod
The single most common mistake I see: a fresh bit screwed onto a rod with a worn, deformed, or cracked shank.
The logic is understandable. "The bit wore out, so I put a new one on." But if the rod's taper seat is wallowed out or the shank is mushroomed from hammer impact, the new bit never seats properly. The load distribution across the taper is uneven. The bit rocks under impact. You get premature skirt cracks, rapid taper wear, and in bad cases the bit walks off the rod mid-hole.
Rule: inspect the rod before it gets a new partner. If the taper seat shows visible wear, deformation, or galling, retire the rod. The cost of a new rod is less than the cost of a new bit destroyed by a bad seat plus the downtime to fish the bit out.
Same goes for the drill bushing. A worn or egged-out bushing lets the shank end wobble. That wobble goes straight into the taper connection. Check the bushing at the start of every shift. Replace it the moment it's out of round. A bushing costs pocket change compared to what it protects.
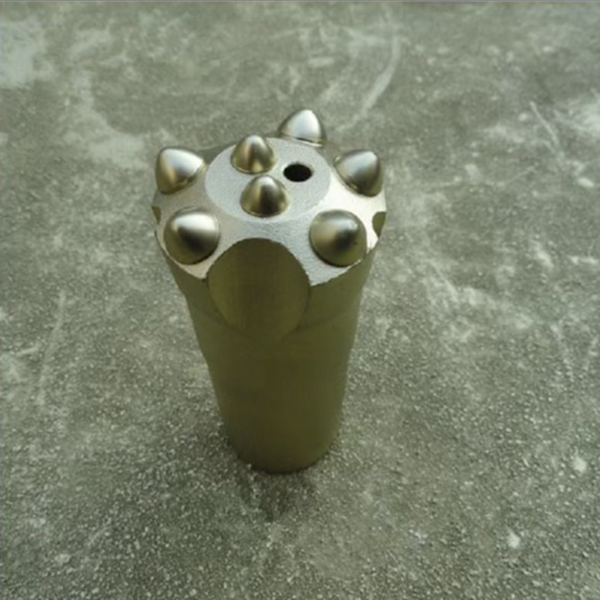
Disassembly: The Tool You Use Determines How Long Things Last
There are two ways to separate a tapered bit from its rod. One involves a proper drift tool and a couple of controlled taps. The other involves whatever's within arm's reach and a lot of frustration.
The second way cracks bit skirts, deforms taper seats, and bends rods. Every time.
A bit skirt crack from rough disassembly spreads under impact and eventually takes the whole bit out of service. A deformed taper seat means the next bit won't seat properly, starting the cycle described above. And a rod that gets whacked laterally against a bench or a rock face picks up micro-bends that turn into fatigue cracks after a few hundred more blows.
Use the dedicated drift. If your crew doesn't have them, order them. They cost less than the first bit you'll destroy without them.
Reconditioning: Never Harden a Taper Seat
This one is non-negotiable and widely violated.
When a taper seat wears, some shops try to restore the fit by grinding the taper and then heat-treating the re-ground surface. The idea is to bring the hardness back up after removing material. The result is a localized hard spot with a different microstructure than the surrounding steel — a stress discontinuity exactly where impact loads concentrate.
A hardened taper seat doesn't wear in. It cracks. And when it cracks, it does so without warning, usually taking the bit with it.
The correct approach: re-grind the taper to spec, maintain the factory angle and surface finish, and leave the hardness profile alone. If the rod has worn past the point where a clean taper can be cut within tolerance, scrap it. Reconditioning is about restoring geometry, not about changing metallurgy. Any shop that offers to "re-harden" your taper seats is doing you a disservice.
Also: precision matters. A taper angle that's off by half a degree won't look wrong to the naked eye, but it'll concentrate contact on a narrow band instead of distributing it across the full seat surface. That band wears fast, the fit loosens, and you're back to replacing bits sooner than you should be.
Lifecycle Tracking: Know What You're Spending
Most small to medium contractors don't track drill steel consumption by the numbers. They order when the rack looks empty and budget by feel. That works until it doesn't.
A basic tracking system doesn't need to be complicated. A clipboard at the tool crib with columns for date, rod ID, meterage, and reason for retirement will tell you more about your tool costs than your purchasing spreadsheet ever will. Pattern recognition is the payoff: if the same rod position fails consistently, or the same operator accounts for disproportionate consumption, or the same supplier's rods retire at half the meterage of another's — you have actionable data instead of a gut feeling.
On the operations side, train the crew to flag problems early. Mushroomed striking end? Retire it. Visible bend? Retire it. Taper seat that won't hold a bit snug? Retire it. A rod that's "still working" but showing damage is a rod that's about to become someone else's problem — usually a more expensive one.
Inventory: Stock Smart, Not Deep
Tapered tooling is commodity stuff. Lead times are short. There's no reason to tie up working capital in six months of rod inventory sitting on a shelf getting surface rust.
Figure out your actual burn rate — rods per week, bits per week — and keep two to three weeks of buffer. Order more frequently in smaller quantities. The cash you free up covers a lot of other things, and you avoid the problem of rods degrading in storage (surface corrosion from humidity, minor handling damage from being moved around a crowded crib).
The Bottom Line
Tapered drill steel is cheap per unit and expensive per project, because most sites buy twice as much as they need to. The difference between a well-managed tool program and a "run it till it screams" approach isn't a better brand of rod. It's five habits: inspect before assembly, disassemble with the right tool, never re-harden, track what you consume, and retire tools before they retire themselves on your time.
The pile in the scrap bin tells the story. A well-managed site has a smaller pile. That's money that stayed in the budget.



