
The Chisel Bit: Simple, Cheap, and Easy to Destroy If You Don't Follow Five Rules
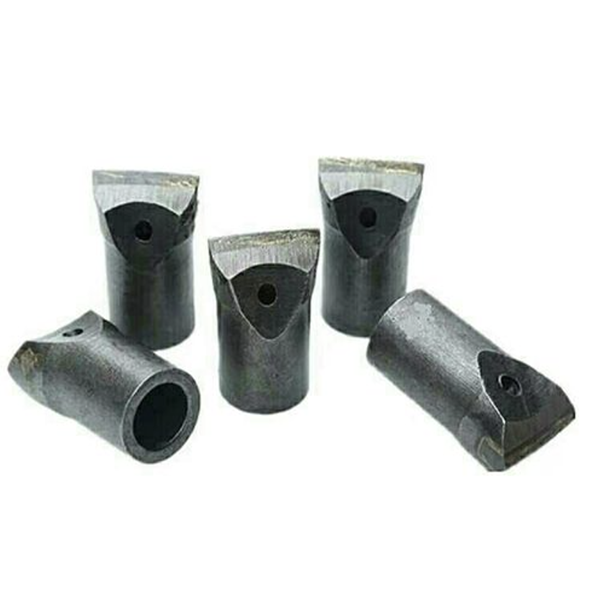
The chisel bit is the oldest design in rock drilling that's still in wide use. A single blade of carbide brazed across a steel body, a tapered socket at the back, and that's it. No buttons to press in, no complex face geometry, no moving parts. Just a wedge on a stick.
That simplicity is the chisel bit's strength and its weakness. It costs less than any other bit type. It drills fast in soft to medium rock. It's easy to regrind. But it's also the most sensitive to operator technique of any bit design — because every cutting edge force concentrates on a single line instead of distributing across multiple inserts.
If you're running chisel bits on hand-held pneumatic drills — still the most common application worldwide — here's what keeps them alive.
Rule 1: The Taper Fit Is Everything
A chisel bit connects to the drill rod through a tapered friction fit. No threads. Just a precisely ground cone on the rod end pressed into a matching socket in the bit body. The interference between these two surfaces is what transmits impact energy and keeps the bit from flying off down the hole.
If the taper doesn't match — wrong angle, wrong surface finish, different manufacturer's tolerance class — the fit is compromised. The bit can walk off during drilling. More commonly, the poor fit concentrates impact on a narrow contact band instead of distributing it across the full taper surface. That band galls and deforms, the fit gets looser, and you're replacing bits and rods in a cycle that feeds on itself.
Buy rods and bits from the same manufacturer. It's the simplest insurance policy in drilling. A matched pair from one supplier with consistent taper grinding will outlast a mix-and-match setup every time.
Rule 2: Collar Soft, Then Open Up
A chisel bit's cutting edge is a single line. When it first touches uneven rock, the entire impact load can land on a fraction of that edge — a point contact instead of a line contact. Full air pressure at that moment chips the carbide or breaks the corner off the insert.
Reduce the air to low for collaring. Let the bit establish a full-width groove in the rock surface. Once the bit is fully seated and cutting across its entire edge width, bring the air up to normal. The ten seconds of patience at the start of every hole is the cheapest bit life insurance you can buy.
Rule 3: Three Millimeters Is the Red Line
A new chisel bit has a sharp cutting edge. As it drills, that edge wears into a flat — the wear land. The wider the wear land, the more impact energy it takes to penetrate, because the same blow is now distributed over a larger contact area.
When the wear land reaches 3 millimeters wide, stop. Replace the bit with a freshly ground one, or send it for professional regrinding. Running past 3 mm doesn't just slow penetration — it multiplies the impact stress on the carbide, increasing the risk of fracture. And a fractured chisel insert usually takes the bit body with it, because there's no backup — it's a single cutting element.
Regrind before the wear land hits 3 mm, not after. The difference in bit life between timely regrinding and running until failure is typically a factor of two or more.
Rule 4: Rebar Is Not Rock
If the bit hits steel — rebar, old roof bolts, abandoned tooling — stop immediately and move the hole. A chisel bit's carbide edge is optimized for rock fracture, not for cutting ductile metal. Impacting steel concentrates loads at the carbide-metal interface in ways that the braze joint wasn't designed to handle. The insert can detach from the body, and a detached insert in the bottom of a hole is a fishing job waiting to happen.
Move the hole. It's faster than fishing, faster than replacing a destroyed bit, and faster than explaining to the site manager why production stopped for half a shift.
Rule 5: Know When to Switch Bit Types
Chisel bits have a fundamental limitation: the single cutting edge means they're vulnerable to jamming in fractured or blocky ground. If the rock face is irregular, the bit can catch on a ledge or wedge in a crack. Once stuck, the extraction forces can bend the rod, deform the taper seat, or pull the bit off entirely.
If you're drilling in conditions where jamming is frequent, switch to a cross bit or a button bit. Cross bits have two cutting edges at 90 degrees — if one edge catches, the other is free. Button bits have multiple inserts distributed across the face, making them almost immune to the kind of ledge-catching that traps a chisel bit.
The chisel bit isn't the wrong tool. It's the right tool for uniform, unfractured rock where cost per bit matters more than anything else. But it's the wrong tool for broken ground, for hard abrasive formations, and for any situation where the risk of jamming outweighs the purchase-price advantage. Know which situation you're in before you collar the first hole.



