
Why Do Drill Rods Fail Early? 14 Operating Habits That Protect the Entire Drill String
A drill rod rarely fails without warning.
The warning may be a polished patch where a guide has been rubbing, a thread that suddenly feels harder to make up, or a spiral scratch running around the rod body. These details are easy to ignore when the crew is under pressure to finish another hole.
Then the rod breaks.
Production stops, part of the drill string may remain down the hole, and a component that should have lasted much longer becomes scrap. In many cases, the steel itself is not the real problem. The damage started with an unsuitable rod, a dirty thread, poor alignment, or one careless move with a vise.
Here are 14 practical rules that help prevent those failures.
1. Match the Drill Rod to the Rig
Start with the rig rather than the rod catalog.
The drill rod must suit the machine’s torque, push-pull capacity, and minimum allowable bending radius. A rod that is too light for the rig can bend or fail under load. A rod that is unnecessarily heavy may increase cost and put extra stress on other components.
Formation conditions, hole diameter, drilling depth, flushing method, and thread type should also be considered. Drill rod selection is a system decision, not a choice based on diameter alone.
2. Do Not Mix Large and Small Drill Rods
Connecting a large-diameter rod directly to a smaller one creates an abrupt change in stiffness and load capacity.
The smaller rod becomes the weak point. Under torque, thrust, bending, and repeated impact, stress concentrates around the transition and threaded connection. The result may be deformation, thread damage, or complete fracture.
If a diameter transition is necessary, use a properly designed adapter and follow the equipment manufacturer’s limits.
3. Keep the Vise Away from Female Threads
A vise can generate enough force to distort a female connection.
Once the internal thread loses its original shape, the mating pin may no longer enter correctly. Forcing the connection together only makes the damage worse. The threads begin carrying load unevenly, accelerating wear and increasing the risk of galling.
Clamp only at the designated handling area and use suitable jaws or protective inserts.
4. Apply the Correct Makeup Force
A loose threaded connection moves under drilling loads. That movement causes the mating surfaces to rub against each other, sharpening thread crests and forming ridges along the flanks.
Eventually, the connection may gall, loosen, or crack near the pin thread root.
Excessive makeup force is also dangerous. It can make the connection difficult to break out and may overload the threads or shoulder. The source guidance recommends keeping hydraulic makeup pressure within 15 MPa, but the rig and drill rod manufacturer’s specified value should always take priority.
Never heat a stubborn connection with an open flame. Heating changes the mechanical properties of the steel and can permanently weaken the joint.
5. Clean Both Threads Before Assembly
A small piece of grit trapped between the pin and box can behave like cutting compound.
Before connecting two rods, clean the male and female threads thoroughly. Remove soil, rock particles, rust, and old contaminated compound. Inspect the shoulder at the same time.
A connection that looks clean from a distance may still contain abrasive material deep inside the thread.
6. Clear the Flushing Passage
Check the rod’s internal waterway before assembly.
Mud, scale, damaged seals, or foreign material can restrict the passage and raise pressure inside the flushing system. Poor flushing also reduces cuttings removal, increases bit temperature, and makes the drill work harder.
Clear the passage before the rod enters the hole. It is far easier than diagnosing a pressure problem after drilling has begun.
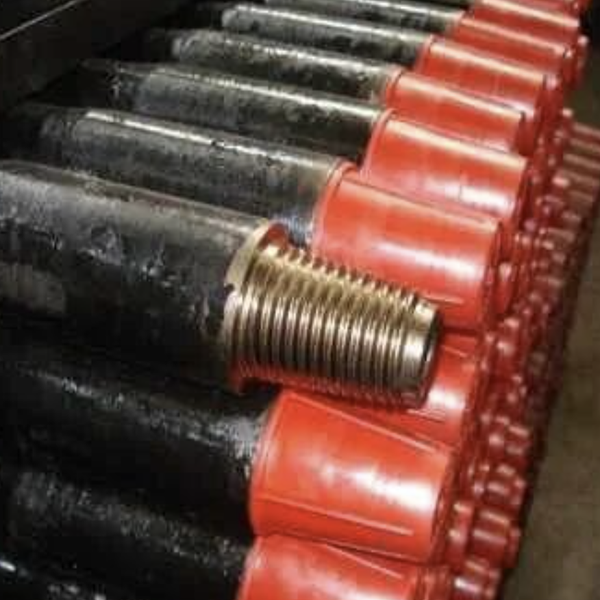
7. Never Force Misaligned Threads
The pin and box must be centered before makeup.
Do not allow the pin to strike the box shoulder or thread. Check that the breakout device, power head spindle, and drill rod are properly aligned. If the connection does not engage smoothly, stop and inspect it.
Cross-threading cannot be repaired by applying more torque. More force simply turns a small alignment problem into a damaged connection.
8. Read Unusual Wear Marks
Every abnormal wear pattern has a cause.
A sharp object inside the hole may score the rod body. A worn or misaligned guide can repeatedly rub the same area. Spiral marks may indicate contact while the rod is rotating under bending load.
A spiral scratch around the rod body that is approximately 1 mm deep and continues for more than one revolution deserves immediate attention. Continuing to drill with that rod risks a fatigue fracture and a costly fishing operation.
9. Replace Damaged Crossover Connections
A damaged drill collar crossover or adapter can destroy the threads on every rod connected to it.
Misaligned threads, crossed threads, deformation, and severe wear should not be treated as cosmetic defects. Once the connection no longer carries load evenly, it transfers abnormal stress to the drill rod.
Replace the defective crossover before installing another rod.
10. Protect Pin Threads During Handling
Many threaded connections are damaged before drilling starts.
When drill rods are lifted, stacked, transported, or moved around the site, an unprotected pin can strike steel racks, the ground, or another rod. A small dent may prevent correct makeup or create a stress concentration.
Use thread protectors and avoid dropping or dragging drill rods.
11. Avoid Mixing Rods from Different Systems
Two rods may appear to have the same thread but still differ in taper, pitch diameter, shoulder geometry, tolerance, or interference.
Those differences can occur between manufacturers because their machining processes, tooling, specifications, and quality controls are not identical. Mixing substantially worn rods with new rods can create a similar mismatch.
For reliable drilling, keep compatible rods together and track their service condition.
12. Repair Minor Thread Damage Early
Localized damage involving roughly one or two threads over a length of about 10 mm may be repairable if caught early.
The connection should be inspected and restored using an approved method before it returns to service. Do not improvise with aggressive grinding, welding, or uncontrolled machining. These methods can change the thread profile or introduce new stress points.
When the damage exceeds the repair limit, retire the rod.
13. Do Not Clamp the Rod Body Carelessly
Clamping the rod body with hard vise jaws can leave dents and deep marks.
These marks reduce the effective cross-section and act as stress raisers under cyclic bending and torsion. A rod can then crack from a location that originally looked like a minor handling scar.
Use the specified clamping position and the correct gripping equipment.
14. Use Proper Thread Compound
Ordinary grease is not a substitute for drill rod thread compound.
A suitable thread compound provides lubrication, separates loaded metal surfaces, protects against corrosion, and helps prevent galling. Too little compound can damage the shoulder and create high spots that allow the connection to loosen.
Apply the correct compound to clean threads in the recommended quantity. Contaminated, poor-quality, or incompatible lubricant can be almost as damaging as using none.
A Five-Minute Drill Rod Check
Before sending the next rod down the hole, check five things:
Are the rod and thread type compatible with the rig and drill string?
Are the pin, box, shoulder, and flushing passage clean?
Has the correct thread compound been applied?
Are the spindle, rod, and handling equipment aligned?
Are there dents, spiral scratches, abnormal wear, or damaged threads?
This inspection takes less time than recovering a broken drill string.
Drill rod life is determined by more than steel grade and heat treatment. Selection, alignment, cleanliness, lubrication, handling, and inspection all matter. Gaea Rock supplies rock drilling tools for mining, quarrying, tunneling, and construction applications. Contact our team to discuss drill rod specifications and compatible drilling components for your equipment and ground conditions.



