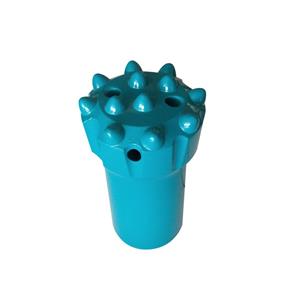
Detailed guide to quickly changing thread button bits on a drilling rig (drilling rig) — fast, safe, and reliable
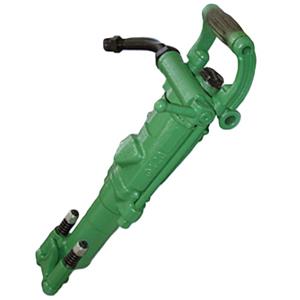
When a thread button bit (thread button bits) on a drilling rig wears out or is damaged, having an efficient and safe replacement procedure is essential. Below is a step‑by‑step method to replace bits quickly, reduce downtime and avoid common problems.

Step 1 — Thorough preparation (lay the groundwork)
Positioning: After confirming the bit needs replacement, slowly operate the rig’s feed beam to bring the bit into firm contact with the rock face. Control the feed precisely so the bit tip bears steadily against the rock; the rock’s reaction force will provide the support needed for the loosening stage.
Controls: Put the rotation control lever in the neutral (middle) position to cut off rotary drive and prevent accidental rotation during the change.
Cooling: Start the flushing water by switching on the water pump so a continuous flow runs through the bit. Forced cooling prevents overheating damage (for example, cracking of carbide buttons) and helps avoid thread seizure, making subsequent disassembly smoother.
Step 2 — Loosen the old bit efficiently (break the connection)
Engage impacts: With the bit pressed against the rock and water flowing, set the impact control lever to the higher impact setting (second gear/high impact). The rig’s impact piston will apply high‑frequency, high‑energy blows to the drill steel and bit.
Rock the feed: Operate the feed handle in alternating short forward (toward the rock) and backward (away from the rock) motions several times (usually 3–5 cycles). This forward–back rocking combined with strong impacts effectively shakes loose the threaded connection, breaking corrosion or sticking. Feel for changes in resistance.
Confirm and retract: When the impact lever feels easier to operate or you detect slight bit movement, the thread has usually released. Smoothly retract the rig and drill steel a safe distance away from the rock face.
Step 3 — Clear and adjust (create working space)
Stop water flow: Once the rig is safely retracted, turn off the water pump and allow residual water to drain to avoid slippery conditions.
Expose the bit: Adjust the feed beam height so the worn bit is fully exposed beyond the rig’s shroud or feed carriage, giving ample, stable access for removal. Ensure the bit is easy to reach and steady.
Step 4 — Swap bits (remove old, install new)
Remove the old bit: Wearing protective gloves, unthread the loosened bit by turning it counterclockwise. If the thread is still tight, use an appropriate bit wrench. Inspect the removed bit for wear and dispose of or retain it per your maintenance policy.
Prepare the new bit: Clean the threads and mating surfaces on both the new bit and the drill steel—remove oil, debris and moisture. Align the new bit’s female thread with the drill steel’s male thread.
Hand‑start and seat: Thread the new bit in clockwise by hand, ensuring it starts true and without cross‑threading. Hand‑tighten (or lightly tap to seat) until it is snug and not wobbling.
Ready for use: With the new bit installed and seated correctly, you’re prepared to return to drilling operations.
Follow the four‑step cycle: Prepare → Loosen → Adjust → Replace. Emphasize cooling, using impact‑assisted loosening and careful thread alignment, and you can change thread button bits on a drilling rig quickly and safely—greatly reducing downtime and keeping operations running smoothly.