
DTH Hammer Maintenance: The 200-Hour Ritual That Keeps a Hammer Running for Thousands
A DTH hammer that's never opened between jobs is a hammer on borrowed time. The internals live in a storm of compressed air, rock dust, water mist, and oil vapor. Piston-to-cylinder clearances are measured in hundredths of a millimeter. A single grain of silica in the wrong place scores a surface that should be mirror-smooth. And none of this is visible from the outside.
The maintenance interval isn't a suggestion. It's the difference between a hammer that runs a thousand hours and one that seizes at three hundred. Here's the program.
The Interval: When to Open It
Two schedules, depending on what you're drilling through:
Standard conditions — dry rock, clean air, proper lubrication: disassemble, clean, inspect, and reassemble every 200 impact hours. At 50 blows per second, 200 hours is roughly 36 million impact cycles. That's the point where normal wear begins to affect clearances measurably, and where preventative inspection catches wear before it becomes damage.
Wet conditions — water injection, mud, or foam drilling: every 100 impact hours. Water washes lubrication off surfaces faster. Mud and foam carry fine abrasive particles that dry air leaves behind. The hammer internals are working in a lapping compound. Check them twice as often.
These are bench intervals. You're not swapping hammers in the hole — you're pulling them on a schedule, doing the service in the shop, and putting them back into rotation. A spare hammer on the shelf makes this practical. The cost of the spare is recovered in extended service life of the fleet.
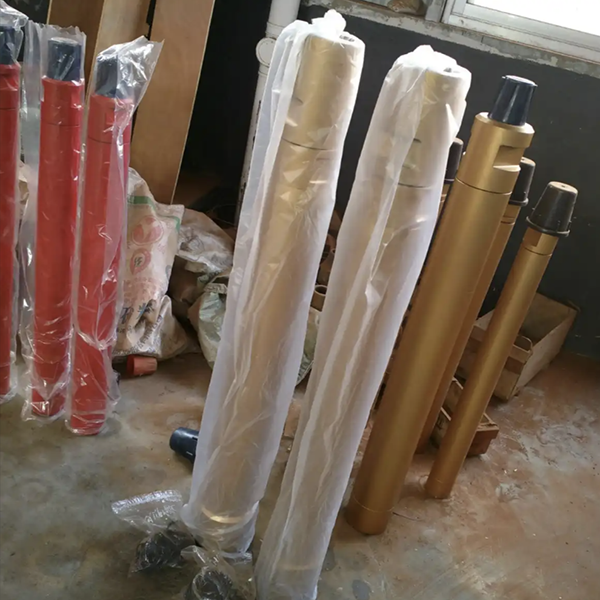
The Opening Sequence
Before you touch a wrench, the hammer exterior needs to be clean. Blow off all mud, dust, and debris with compressed air. Dirt on the outside becomes dirt on the inside the moment you break a connection.
Open the hammer on a clean bench, not on the ground next to the rig. Catch the parts in order as they come out. Lay them out in sequence on a clean rag. The assembly order matters, and parts that look similar — the distributor, the check valve seat, various bushings — go back in specific orientations. A phone photo of the laid-out parts before disassembly saves confusion during reassembly.
The Inspection
Every part needs eyes on it. Not a glance — an inspection.
Piston and cylinder: these are the heart of the hammer. Measure the piston OD and cylinder ID with a micrometer and bore gauge. Compare to the manufacturer's clearance spec. If the gap has grown beyond the wear limit — typically a few hundredths of a millimeter — replace whichever side is worn, or both. A piston running in an oversized cylinder loses impact energy because air leaks past instead of driving the stroke. It also rattles, and rattle accelerates wear on every other component.
Look for scoring on both surfaces. Light scratches can be polished out with fine emery cloth or an oilstone. Deep scoring — anything you can feel with a fingernail — means replacement. A scored piston in a scored cylinder is a self-destructing pair.
Check valve: the little flapper or ball that prevents cuttings from back-flowing into the hammer when air pressure drops. It should move freely with no sticking. Clean the seat and the sealing surface. If the valve doesn't seal, cuttings enter the hammer on every pressure drop. If it doesn't open fully, air flow is restricted and impact energy drops.
Chuck : two measurements matter. First, the OD of the chuck compared to the OD of the wear sleeve. If the chuck has worn smaller than the sleeve, it's no longer protecting the hammer body from borehole wall contact. Replace it.
Second, the spline clearance. Insert a new bit shank into the chuck splines and measure the rotational play at the bit tip. If the bit can twist more than 5 millimeters at the gauge diameter, the splines are worn past the service limit. Worn splines convert impact into chatter, reduce energy transmission to the bit, and accelerate bit shank wear.
All other parts: look for cracks, especially thermal cracks on surfaces exposed to impact or hot air. A crack that hasn't propagated yet will propagate. Replace cracked parts. Look for galling on any sliding surface. Polish out minor galling. Replace major galling. Look for corrosion pitting on parts from hammers that sat in storage without proper preservation. Light pitting can be polished. Deep pitting requires replacement.
The Assembly
Clean every part with solvent. Blow dry with compressed air. Apply a film of rock drill oil to every surface — not a pool, just a film.
Assembly order: wear sleeve upright. Bushing into the bottom of the sleeve first — use a copper drift, not a steel hammer, to seat it. Chuck onto the bit shank, retaining ring with a fresh O-ring, then thread the bit-chuck-ring assembly into the bottom of the wear sleeve. Thread grease on the connections — a light coat prevents galling and makes the next disassembly easier.
Now the top end: distributor pressed into the cylinder with a copper drift. Piston into the cylinder. The piston-cylinder-distributor assembly slides into the wear sleeve from the top. Seat it with the copper drift. Spring and check valve go in next. Check that the check valve moves freely by shaking the assembly — you should hear it click.
Backhead threads greased and threaded onto the top of the wear sleeve. Torque to spec — not guess-tight, not impact-gun-tight. Proper torque keeps the assembly from loosening during operation and prevents thread galling on disassembly.
Final check: reach in with a wooden dowel or brass rod and push the piston. It should slide freely through its full stroke with no binding. If it doesn't, something is misaligned or a part is in backwards. Find it now, not at the bottom of a hole.
The Routine That Pays
A hammer maintained on the 200-hour (or 100-hour wet) schedule will typically run through multiple service cycles before any major parts need replacement. The first service might only need cleaning and inspection. The second might need a piston. The third might need a chuck. But catching wear at the scheduled interval means replacing one part at a time, on your terms, in the shop — not rebuilding a destroyed hammer that seized in the hole.
The maintenance program costs shop time and a spare hammer. It returns predictable service life, fewer downhole failures, and a per-meter cost you can actually forecast. That's not a cost. That's control over your tooling budget.



