
The Drill Rod Problems Nobody Checks Until Something Breaks: An HDD Field Guide
Horizontal directional drilling puts drill rods through a kind of abuse that vertical drilling doesn't. The rods spend their entire working life in contact with the borehole wall, dragging through soil and rock under combined tension, torque, and bending. They come out coated in mud. They go back in. Again and again, for thousands of meters. And the parts that fail first are almost never the parts people inspect regularly.
Here's what actually goes wrong with HDD drill rods, where to look, and what to do before the failure that shuts down the bore.
The Joints Wear First — And Nobody Sees It Coming
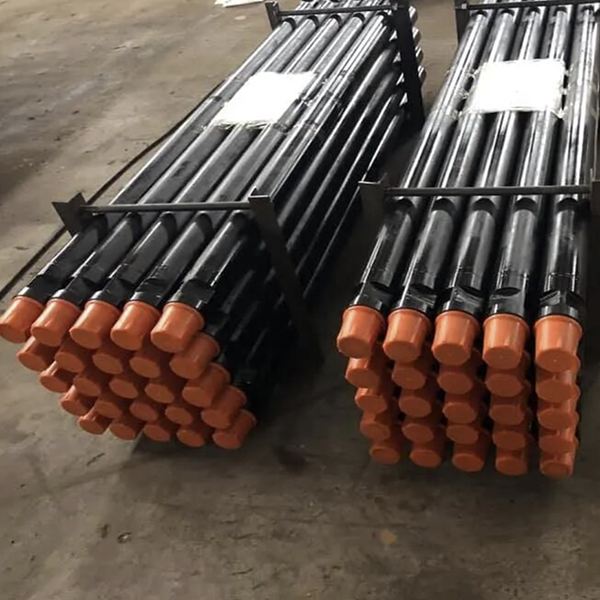
The tool joint — the thick, upset end where rods connect — is the largest-diameter section of the drill string. It's also the section in constant contact with the borehole wall. As the string rotates and advances, the joint rubs against soil, rock, and cuttings. The body of the rod, smaller in diameter, floats inside the hole. The joint takes all the abrasion.
Joint wear shows up as a reduction in outer diameter and a loss of shoulder thickness on the box end. These are the two numbers that determine joint grade. When the OD drops below the minimum for the grade, or the shoulder thins past the rejection limit, the joint is done — even if the rod body is still in good condition.
A common complication: different steel grades on the same site. A G-105 joint and an S-135 joint of the same nominal size may have different minimum OD specifications. When you're grading a mixed string, grade to the lower standard. A joint that passes S-135 criteria might already be below the G-105 minimum. Consistency keeps you safe. Guessing doesn't.
What to do about it: apply hardbanding — a wear-resistant weld overlay — to the joint OD before the rod goes into service. Hardbanding sacrifices itself to the borehole wall instead of the joint steel. When the hardbanding wears thin, reapply it. This single practice can double or triple joint life. Also, when a joint drops below grade 2, consider cutting it off and replacing it if the tube body is still sound. A new joint on a good tube costs less than a new rod, and you've salvaged most of the asset.
Thread Galling: The Torque Problem Nobody Admits To
HDD rod threads fail in two ways. The obvious one is mechanical damage — crushed threads, spalled crests, deformed profiles from overload. These get caught during inspection because they're visible.
The sneaky one is galling — cold welding between the thread surfaces during make-up. The threads bond on a microscopic level. When you try to break the connection, the metal tears instead of sliding. The threads come out scored, stripped, or seized solid.
The root cause in HDD is almost always the same: insufficient make-up torque on the far side of the crossing. The rod string is made up on the entry side with proper equipment at proper torque. On the exit side, where the reamer or pullback assembly is connected, the crew is working with whatever tools are at hand. The torque applied is a fraction of spec. When the pullback starts and the string loads up, the under-torqued connection tightens further — a secondary make-up at uncontrolled, excessive torque. That's when galling happens.
The fix: use dedicated make-up equipment on both sides of the crossing. No exceptions. Apply thread compound with 40-60% zinc content — this specific formulation provides the right friction characteristics to prevent galling during both make-up and break-out. Zinc-based compounds also resist washout better than graphite-based alternatives in wet HDD conditions. And if a connection has galled, don't try to save it. Cut it off and re-thread. The cost of a galled connection that seizes during pullback is a lost bore.
The Cracks You Can't See
HDD rod body cracks concentrate in one predictable location: the upset transition zone. This is the tapered section where the tube body thickens to meet the tool joint. It's the highest-stress region in the rod because it's where the cross-section changes, creating a natural stress concentration.
The cause is bending. An HDD rod string follows a curved bore path. If the actual pilot hole curve is tighter than designed — a kink, a sharp correction, a dead bend — the rods passing through that section see bending moments far beyond their design limit. The same thing happens during reaming if the enlarged hole is irregular and creates an angle between the reamer, the rod string, and the bore axis.
Bending fatigue cracks initiate at the surface of the transition zone and grow inward with each cycle. By the time they're visible to the naked eye, they're deep enough to be dangerous.
Detection: magnetic flux leakage (MFL) inspection is the primary tool for finding body cracks. Run every rod through MFL after every major bore or on a calendar schedule. MFL has blind spots — the upset transition zone itself, the shoulder face, and the joint OD. These areas need supplementary magnetic particle inspection (MT). Clean the rods thoroughly before inspection — mud, scale, and rust create false signals that hide real defects.
Seal Faces: Less Critical, Still Relevant
HDD operates at relatively low mud pressure compared to deep oil and gas drilling — typically 15-30 meters of hydrostatic head at ambient temperature. The seal faces on HDD tool joints don't need to hold back thousands of PSI.
This means minor seal face damage — small raised spots, superficial pitting — can be dressed with a file and returned to service. Deep pits or cracks that run across the seal face from ID to OD should be rejected and repaired. The standard is lower than oilfield, but not zero. A seal face that leaks mud during drilling reduces annular velocity at the bit, compromises hole cleaning, and can lead to a packed annulus and stuck pipe.
One HDD-specific problem: mud left inside the rod bore after the job. Unlike vertical wells where gravity drains the pipe, horizontal rods trap residual mud. Over weeks of storage, that mud dries and hardens. Restarting a bore with a partially plugged rod restricts flow, spikes pump pressure, and can blow out a connection. Blow out every rod with compressed air and fresh water after the job. Cap the ends.
The Allocation Rule
Not all rods in the fleet are equal. Some have more meterage. Some have been through harder bores. Some have joints nearing their grade limit.
When planning a bore, allocate your best rods to the highest-stress operations: reaming and pullback. These phases generate the highest combined tension, torque, and bending loads. The rods at the front of the string — closest to the reamer — see the worst of it. Put your premium rods in those positions. Use your serviceable but older rods for the pilot hole, where loads are lower and failure consequences are less severe.
This isn't about favoring some rods over others. It's about matching rod condition to load severity so the entire fleet ages at roughly the same rate. Track every rod. Know its grade. Allocate accordingly.



