
Rock Drill Long Bolt Replacement: What to Check While You've Got It Apart
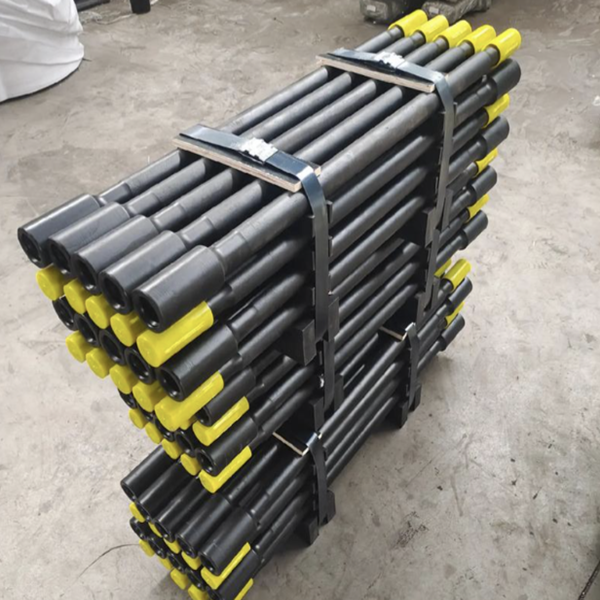
Long bolts — the tension studs that clamp a rock drill's front head, cylinder, and back head together — are one of those components nobody thinks about until they fail. And when they fail, the symptoms are easy to misdiagnose: oil seeping from around the bolt holes, a new vibration that wasn't there last shift, or a slight looseness at the drill's joints that makes the whole machine feel vague.
Those symptoms mean the bolts have lost their preload — either they've stretched past their elastic limit, the nuts have backed off, or the bolt itself is fatiguing. Any of those means the drill needs to come apart. And since you're going to have the front head off anyway, there are three consumables worth inspecting while you're in there — because replacing them now costs a fraction of what they'll cost if they fail in service.
What Long Bolts Actually Do (And Why They Fail)
Every hydraulic or pneumatic rock drill has a set of long bolts — usually four, sometimes six — running the full length of the body from front head to back head. Their job is simple: clamp the three main sections together with enough preload that the internal pressures from piston impact and hydraulic fluid can't separate the joints. A properly torqued long bolt is stretched elastically, pulling the sections together with a clamping force that exceeds the peak separating force during operation.
When a long bolt loses preload — through stretching, thread relaxation, or nut loosening — the joint between the cylinder and front head can micro-separate with every piston blow. That micro-separation pumps oil out through the joint. It also allows the front head to shift slightly relative to the cylinder, which misaligns the shank guide bushing with the piston bore, and the shank adapter starts taking impact at an angle.
The failure signals are clear once you know what to look for: oil weeping from around the bolt heads, increased vibration that's worst at full impact power, and a subtle change in the drill's sound — the crisp percussive crack becomes duller, more resonant, as energy is lost at the joint.
If you catch it early, you're replacing bolts and gaskets. If you run it until something breaks, you're replacing pistons, cylinders, or front heads. The economics are not subtle.
The Replacement Procedure — And What to Look at Along the Way
The step-by-step for long bolt replacement is straightforward enough. Secure the drill on a clean workbench — not on the floor, not on a bucket, not balanced on the rig's tracks. A workbench. You're dealing with components that have precision fits, and dirt on a mating surface will haunt you as a leak later.
Before you touch a wrench, clean the exterior of the drill thoroughly. Rock dust, grease, and slurry that get into the internals during disassembly will embed in bearings, score sealing surfaces, and block oil passages.
Crack the nuts loose with a socket — not an impact gun, not a pipe wrench on the bolt head. Impact guns can gall the threads on the way off if the bolt is under residual tension. Once all nuts are loose, back them off evenly in a star pattern, not one at a time all the way. Uneven release of the clamping force can tilt the front head and damage the alignment of the internal components.
Lift the front head straight off. Don't pry it, don't lever it with a screwdriver between the mating faces. If it's stuck — and they often are, because the gasket has bonded over time — tap gently with a soft-faced mallet around the perimeter until it releases.
Now, While You're In There: Three Consumables to Inspect
The front head is off, the guts of the drill are exposed. You came here to replace long bolts. But while you have access, check three things that will save you from pulling this drill apart again in three months.
First: the shank guide bushing. This is the bushing in the front head that supports the shank adapter. It's the most heavily loaded wear component in the front end. Measure the internal diameter — if it's beyond the manufacturer's service limit, the bushing needs replacing. Check the bore surface for scoring, galling, or uneven wear. A bushing that's worn oval — and this happens when the drill consistently runs bent drill rods — will allow the shank adapter to wobble on every strike, and that wobble will destroy the new front head seals you just installed.
Replacing the shank guide bushing while the front head is off takes minutes and costs a modest amount. Replacing it after it fails in service — when the wobbling shank adapter has destroyed the piston, the seal bores, and possibly the front head casting — costs orders of magnitude more.
Second: the shank adapter itself. Pull it out and inspect the sealing surface — the portion that rides against the front head oil seal. It should be smooth, polished, and free of scoring, pitting, or corrosion. Any roughness on that surface will act as a cutting tool against the new seals. Also check the striking face where the piston hits — a mushroomed or pitted striking face means the piston has been impacting off-center, which usually traces back to a worn guide bushing.
Third: the front head seals. You're going to replace these anyway — you'd be foolish not to while the front head is accessible — but inspect the old ones before you throw them away. The wear pattern on the old seals tells you what was happening inside the drill. Even wear around the full circumference means the shank adapter was running true. One-sided wear means the adapter was deflecting — and that means the guide bushing was worn, the drill rods were bent, or the drill was being operated at an off-angle.
Torque Values and Why They Matter
Long bolt torque is not a "tight enough" judgment call. Under-torqued bolts lose preload and the joint leaks. Over-torqued bolts yield — they stretch permanently, losing preload just like under-torqued ones, but with the added bonus of possibly snapping during the next torque cycle.
Every drill model has a specified torque value. A common hydraulic drifter in the A18 class might call for 300 N·m on the rear bolts and 350 N·m on the front bolts. That difference — 50 N·m more on the front — exists because the front end takes the brunt of the impact reaction force and needs higher clamping to prevent joint separation.
Use a calibrated torque wrench. Not the one that's been kicking around the toolbox for five years, not the impact gun with a "torque stick," not "two grunts on a breaker bar." A calibrated torque wrench. Tighten in a star pattern, in two or three progressive steps to final torque.
After assembly, run the drill at no load for five minutes. Check for oil leaks around the bolt heads and at the joint line. Check for abnormal vibration or sound. If everything is quiet and dry, the job is done. If there's any sign of leakage, stop and re-check — a leak on a freshly assembled drill means something isn't seated right, and running it won't make it better.



