
Tapered Drill Bit Skirt Flaring: Why It Happens and How to Prevent It
A tapered drill bit can fail without losing its carbide first.
The cutting edge may still look usable. The insert may not be badly worn. Yet the rear skirt around the taper hole has expanded, distorted, or cracked. The bit no longer seats correctly on the drill steel. It begins to loosen, run off-center, or becomes difficult to remove.
This failure is often called skirt flaring.
It is a frustrating problem because it can make a bit unusable before normal carbide wear has ended its service life. It also affects more than the bit. A flared taper hole can damage the drill-steel shank, reduce energy transfer, worsen hole accuracy, and create downtime during a shift.
The solution is not one material change or one operating adjustment. Skirt flaring usually results from a combination of bit selection, geometry, steel quality, manufacturing control, taper fit, and field practice.
What is skirt flaring in a tapered drill bit?
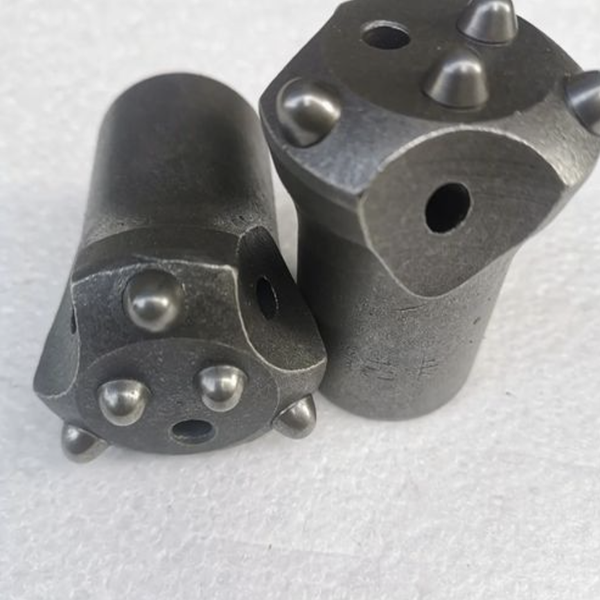
A tapered drill bit connects to the drill steel through a tapered hole. During drilling, impact energy travels from the rock drill through the steel and into the bit. The taper connection must stay tight enough to transfer energy efficiently while allowing the bit to be removed when needed.
Skirt flaring happens when the bit body around the taper hole expands or deforms under repeated impact. The rear opening of the bit can become oversized, sometimes with visible cracking or a loss of the original shape.
Once the fit is compromised, the connection is no longer stable. The bit may rock on the taper, absorb energy inefficiently, or create concentrated loads on the drill steel and bit body.
In severe cases, the problem accelerates quickly. A loose connection produces more impact concentration, which creates more deformation, which makes the connection even looser.
The first cause: a bit that does not match the job
A tapered drill bit must be selected for the rock, the drill, the hole diameter, and the operating conditions.
The same bit design may work well in medium-hard granite and fail rapidly in a much harder, tougher, or more abrasive formation. A light-duty bit body may not have enough strength around the taper hole for heavy impact conditions. A bit with an unsuitable face design may drill inefficiently, creating more heat and stress in the body.
This is why one universal tapered bit is rarely the best answer.
A proper product range should include different designs for different rock conditions and drilling equipment. Chisel, cross, horseshoe, and button-bit profiles may all have a place. The correct choice depends on the formation and the working load, not simply on what is available in the storeroom.
If the same bit type repeatedly shows skirt flaring in one mine or tunnel, the first question should be whether the bit is properly matched to that application.
Geometry around the taper hole matters
The taper-hole area is a structural connection, not an empty space drilled into the bit body.
Wall thickness, taper angle, insertion depth, bottom geometry, transition radii, and contact area all influence how the bit absorbs impact. Sharp internal transitions or uneven wall thickness can concentrate stress. Insufficient contact between the drill-steel taper and the bit hole can create localized loading. A poor fit can turn the connection into a hammering point instead of an energy-transfer point.
A well-designed tapered connection should support several goals:
Stable and centered seating on the drill steel
Sufficient contact area for impact transfer
Adequate bit-body thickness around the taper hole
Smooth transitions that reduce stress concentration
Reliable self-locking without excessive force during installation
Practical removal after drilling
The connection must be strong, but it should not depend on brute force. Striking a bit onto a taper too aggressively can damage the fit before drilling even begins.
Bit-body steel and heat treatment are critical
A tapered bit skirt works under repeated shock loading. It needs enough strength to resist plastic deformation and enough toughness to avoid brittle cracking.
If the bit-body steel is too soft, the taper hole may expand under impact. If it is too hard or poorly heat-treated, the area may crack instead. The correct result is a balance: stable geometry with sufficient resistance to fatigue and impact.
That balance depends on the steel grade, forging quality, machining accuracy, heat-treatment cycle, and cooling control. Material quality cannot be judged from appearance alone.
The bit may look identical to another product while having very different performance because of differences in steel cleanliness, grain structure, hardness distribution, or heat-treatment consistency.
For demanding applications, suppliers should be able to explain how they control bit-body material and how the product is matched to its intended rock conditions.
Taper fit and drill-steel condition cannot be ignored
A good bit on a worn drill steel can still fail early.
The taper shank must have the correct angle, surface condition, and dimensions. A damaged, undersized, oversized, or poorly finished taper can prevent full seating. The result is uneven contact and concentrated impact on a small area of the skirt.
Before fitting a new bit, inspect the drill-steel taper for:
Visible wear or flattening
Cracks or surface damage
Corrosion and built-up debris
Incorrect taper angle
Poor concentricity
Evidence of overheating or abnormal contact marks
The taper hole inside the bit should also be clean. Dirt, chips, scale, or residue can prevent correct seating and create a false fit.
A tapered connection is only as good as both halves of the connection.
Installation and removal practice affect tool life
Field handling makes a measurable difference.
A bit should be fitted securely but not abused during installation. Excessive hammering can deform the skirt or damage the taper surfaces. During operation, the crew should watch for unusual vibration, reduced penetration, water leakage, or signs that the bit is not running true.
Removal deserves the same care.
Improvised methods such as uncontrolled striking can damage the taper hole, the bit body, or the drill steel. A purpose-made bit remover and regular inspection gauge help protect the components and make the process more repeatable.
Regrinding also matters. If a bit is run until the carbide edge is excessively blunt, drilling loads increase. The bit may generate more heat and transfer more damaging stress into the body. Timely regrinding helps preserve both penetration performance and structural life.
A practical prevention checklist
If tapered drill bits are showing repeated skirt flaring, work through the system rather than replacing bits one by one.
Confirm that the bit design matches the rock hardness and drilling equipment.
Check drill-steel taper condition and dimensional accuracy.
Inspect taper holes for correct seating and contact marks.
Review bit-body material and heat-treatment consistency with the supplier.
Avoid forced installation and uncontrolled removal methods.
Maintain bit-removal tools and taper inspection gauges.
Regrind carbide edges before excessive wear increases drilling stress.
Record where and when failures occur to identify formation-specific patterns.
This information turns a recurring failure into a solvable engineering problem.
The goal is normal wear, not early deformation
A good tapered drill bit should retire because its cutting edge has completed useful work, not because the taper hole has distorted prematurely.
When bit design, material, fit, and use are controlled together, skirt flaring becomes far less likely. The drill string stays tighter, impact energy transfers more efficiently, and the crew gets more predictable life from both the bit and the drill steel.
That is the real objective: a stable connection that lets the carbide do the cutting and lets the bit wear normally.



