
Threaded Button Bit Machining: 5 Controls That Protect Tool Life
Why Does Threaded Button Bit Machining Decide How Long the Bit Lives?
A threaded button bit can look perfect when it leaves the workshop and still lose impact energy during its first shift. The hidden problem is often inside the shank body: the machining datum changed between operations, a sharp corner was left beside a chip groove, or a burr damaged the matching drill rod.
The shank body is not simply a piece of steel holding the buttons. It transfers impact energy, carries the threaded connection, guides rotation, and helps flushing remove rock powder. Small machining errors can therefore become assembly problems, uneven loading, stress concentration, and premature failure.
The following controls are the foundation of reliable threaded button bit machining.
1. Use One Machining Datum Throughout the Process
The same machining datum should be used for turning the outside diameter, cutting the thread, and milling the chip evacuation grooves. Changing the datum during production can introduce coaxiality errors.
A bit may still pass a basic visual inspection after this happens, but the thread, outside diameter, and chip passages may no longer share the same centerline. Once the bit is working under impact, that misalignment can create uneven contact and reduce the efficiency of energy transfer.
A stable process starts with a clear datum plan, consistent clamping, and verification after every major setup change.
2. Treat the Thread as an Energy Transfer Component
The thread is the main connection between the button bit and the matching drill rod. It must meet the drawing requirements for thread size, pitch, profile, and tolerance.
A clearance that is too large can waste impact energy and accelerate wear at the mating surfaces. A clearance that is too small can make assembly difficult or cause the connection to seize. Neither condition is acceptable in a production drilling operation.
Thread quality inspection should cover more than the nominal diameter. The thread surface, relief area, and thread runout must be free from scratches, dents, burrs, and oxide scale. These defects can interfere with assembly and become initiation points for fatigue damage.
For buyers of rock drill bits, the thread standard and the matching rod specification should always be confirmed together. A good bit cannot compensate for an incompatible connection.
3. Give Rock Powder a Clean Exit
Chip evacuation grooves and holes must be machined according to the drawing location and dimensions. Their purpose is to give crushed rock a reliable path out of the hole. If the passage is poorly positioned or becomes blocked, powder can accumulate around the bit and increase friction, heat, and wear.
The groove mouth, bottom, and edges should use an appropriate R transition. Sharp corners are dangerous for two reasons. They can trap rock powder, and they create stress concentration under repeated impact.
The same principle applies to every transition on the shank body:
The tapered body to the outside diameter
The outside diameter to the end face
The chip groove to the threaded section
Any other change in section shown on the drawing
These areas should follow the specified fillet radius rather than using a sharp 90-degree transition. After machining, a simple hand check is valuable. The operator should feel for steps, raised edges, or burrs that may not be obvious in a quick visual inspection.
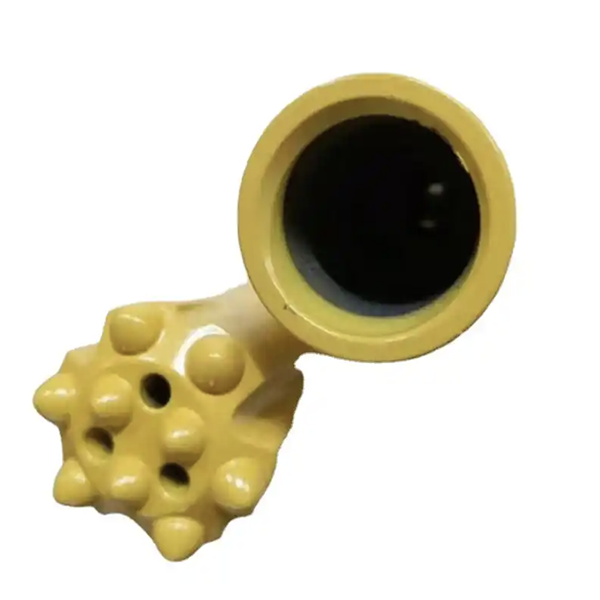
4. Deburr the Surfaces as Carefully as You Machine Them
Complete deburring is a basic requirement, not a cosmetic finishing step. Particular attention should be paid to thread roots, profile edges, and the corners of the relief groove.
A practical method is controlled hand finishing with fine abrasive paper. The goal is to remove the burr without changing the designed thread profile or transition radius. Any remaining burr can scratch the mating drill rod during assembly, making a good thread appear to be a poor fit.
After deburring, the bit should be cleaned so that abrasive particles, oxide fragments, and loose chips do not remain inside the threaded connection or flushing passages.
5. Make Inspection Part of Every Critical Operation
Inspection should not wait until the finished bit reaches the final inspection station. Every critical machining operation should receive 100% verification.
Thread dimensions should be checked with GO and NO-GO thread gauges. The thread surface, relief area, and transition radii should be checked visually and by touch. This combination catches both dimensional errors and surface defects.
The final inspection should include a trial assembly using the thread gauge and a standard matching drill rod. The rod should enter smoothly, without binding or abnormal resistance. When tightened, the torque should feel uniform rather than suddenly increasing at one point.
This final fit test connects the workshop measurement to the actual field condition. A bit that passes a diameter check but binds during assembly is not ready for service.
6. Equipment Matters, but Process Discipline Matters More
Some overseas tooling manufacturers use multi-axis machining centers and concentrate most shank-body operations in one production system. This approach generally requires significant equipment investment and can provide stable quality with lower manual labor. Its limitation may be a lower machining throughput.
Many domestic manufacturers use distributed processes, specialized machining equipment, and, in some cases, robotic handling. This arrangement can provide high efficiency, lower equipment investment, and stable quality when the process is properly controlled.
The important lesson is that equipment labels do not guarantee bit performance. Datum control, thread inspection, transition quality, deburring, and final trial assembly are what determine whether the finished threaded button bit performs consistently.
7. A Practical Release Checklist
Before releasing a threaded button bit for shipment, the production or quality team should confirm:
The drawing revision, thread standard, and machining datum are correct.
Thread size, pitch, and profile pass the appropriate gauges.
Thread surfaces and relief areas are free from scratches, dents, burrs, and scale.
Chip evacuation grooves and holes match the specified position and dimensions.
All transitions have the required radius and no sharp corners.
The complete bit has been deburred and cleaned.
Trial assembly with the standard drill rod is smooth and the tightening torque is even.
Inspection records can be traced to the machining batch.
What Should Buyers Ask Their Bit Supplier?
When comparing threaded button bits, do not ask only about button grade or unit price. Ask how the supplier controls the threaded shank body.
A reliable supplier should be able to explain the thread standard, matching drill rod, machining datum, groove design, deburring method, and inspection procedure. These details matter when the bit must work with extension rods, shank adapters, or a complete rock drilling system.
For Gaea Rock customers, matching the threaded button bit with the correct drill rod and related rock drilling components helps maintain reliable energy transfer from the rock drill to the cutting face. The right connection, clean chip evacuation, and disciplined machining process together protect productivity and tool life.
A threaded button bit earns its service life long before it reaches the rock. It starts with one stable datum, accurate threads, smooth transitions, complete deburring, and inspection that leaves no room for guesswork.



